Check out more of the photos on this page:
http://mehusculpture.blogspot.com/p/meltting-wax-face.html

 |
| This is before it went in the kiln. The way I painted on the glaze |
 |
| Another before shot |
 |
| After.... The glaze did what it wanted I guess? I kind of like the color but I dont claim to understand how or why. This is white slip sprayed on with gold plum brushed on in the gas kiln. It turned out interesting/ |

 |
| I only glazed the mouth and tongue white from what I can ramamber so interesting that it got color. I kind of like it. |
 |
| The right side of the cows head (left for you if looking straight on) got a lot of weird color variation. Almost a grey/green color.. I am thinking it is just how the glaze ran over the slip but I have no idea really. |
 |
| Hole in the back. Original thinking was it could hang on a wall. Could also plug it with some wax or something and use it for a vase. haha |
 |
| COW NOSE!! |
 |
| from above |
 |
| another angle |
 |
| from below |
 |
| Another angle |
 |
| I kind of like how shiny it is. |
 |
| moo. |
 |
| I cast another under head (core) in plaster so that I could do a second wax head. |
 |
| Plaster under head after I sanded it and cleaned it up a bit |
 |
| Sealed it with denatured alcohol and shellac. |
 |
| after a coat or two of shellac |
 |
| I cut myself a piece of wax to fit for an eyelid on my first wax casting. |
 |
| After attaching. It still needs some cleaning up but it has its eyelid now at least |
 |
| I started to patch up the empty spot on the neck. The wax is white when hot. I am hoping it will yellow up to match the rest of the head after a day or so. |
 |
| A second wax casting of the head. This one over the plaster head core. |
 |
| Two wax heads and one clay head |
 |
| Here are the three creepy heads together. Front head is new wax. Right head is old wax (yellows overnight) on top of aluminum and the left is the original clay head. |
 |
| Blanket mold turned out. Anna showed me how to patch thin spots so next time I make one I will know how. |
 |
| Getting all strapped up for pouring the beeswax |
 |
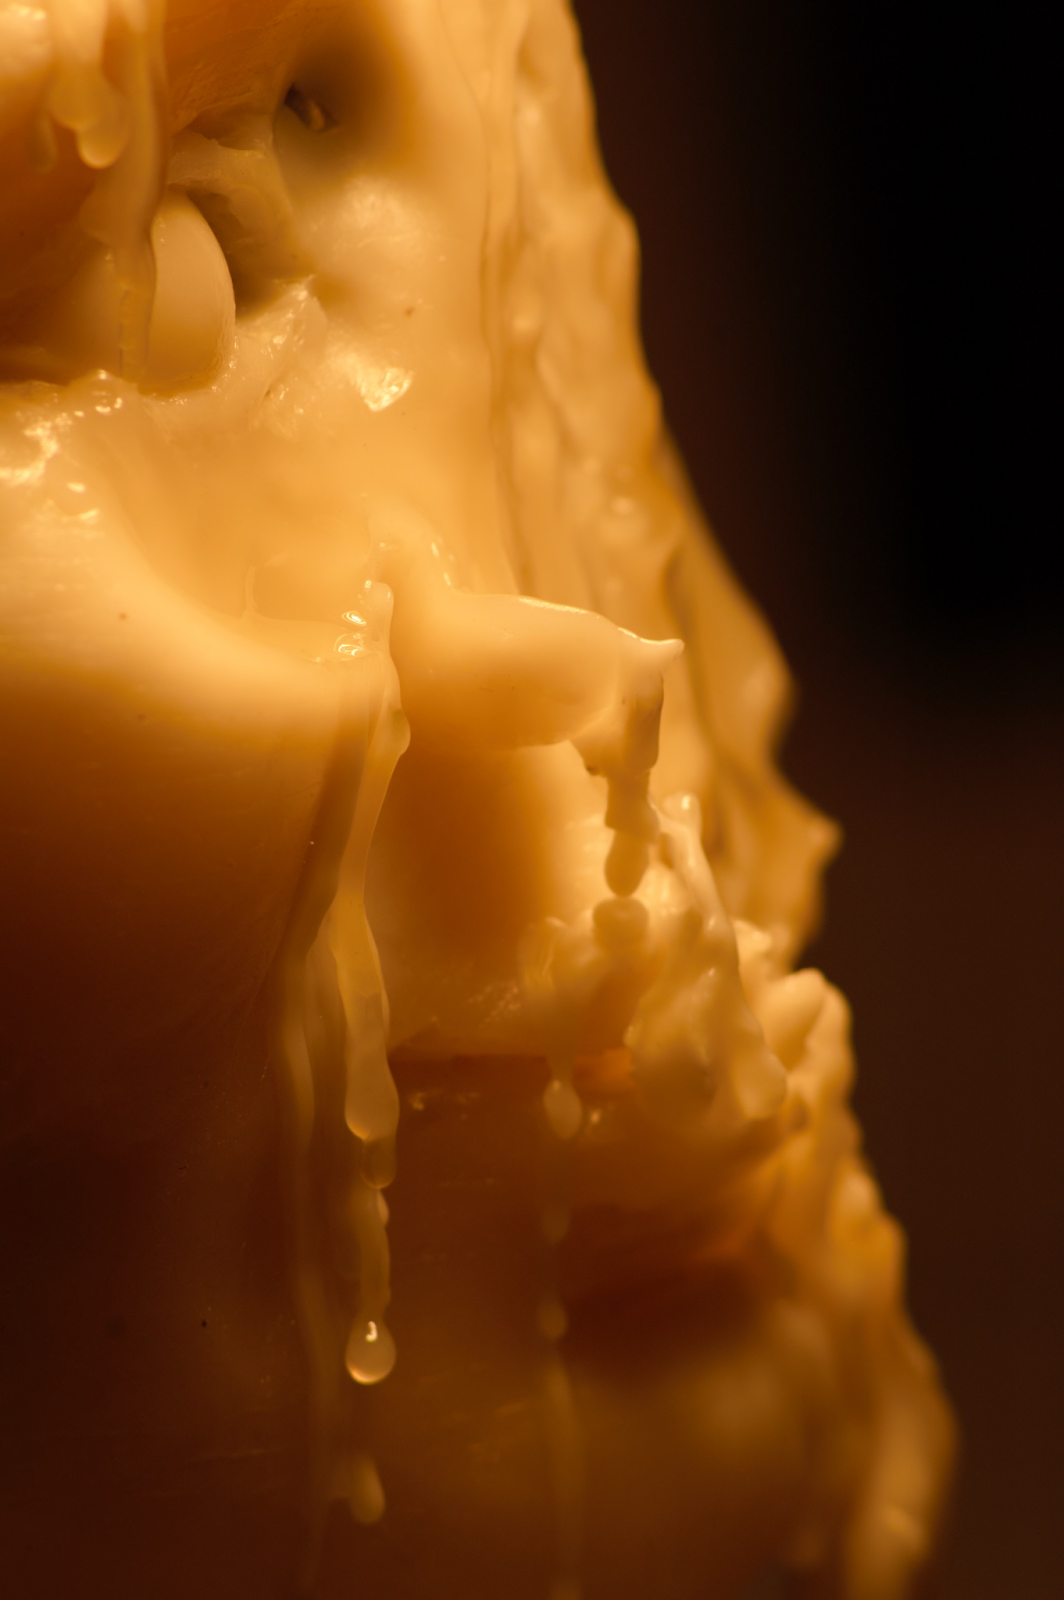
| Here is the first pour attempt. The bottom right of the neck did not cast and also the eyelid you can see on the right did not form. These should be easy patches. The lines in the forehead are from pouring the wax in layers as it was hardening. They can be easily smoothed out. I cut a piece of wax for a replacement eyelid I will be reattaching later. I am considering leaving the piece white for melting and painting a second piece. Pretty happy overall with this as my first cast of my first bust ever. First time in wax and first time learning to do a mold like this (thanks to Anna) |
 |
| To show the cut off of the head at the moment |
 |
| Lines in the forehead. Easily smoothable though. |
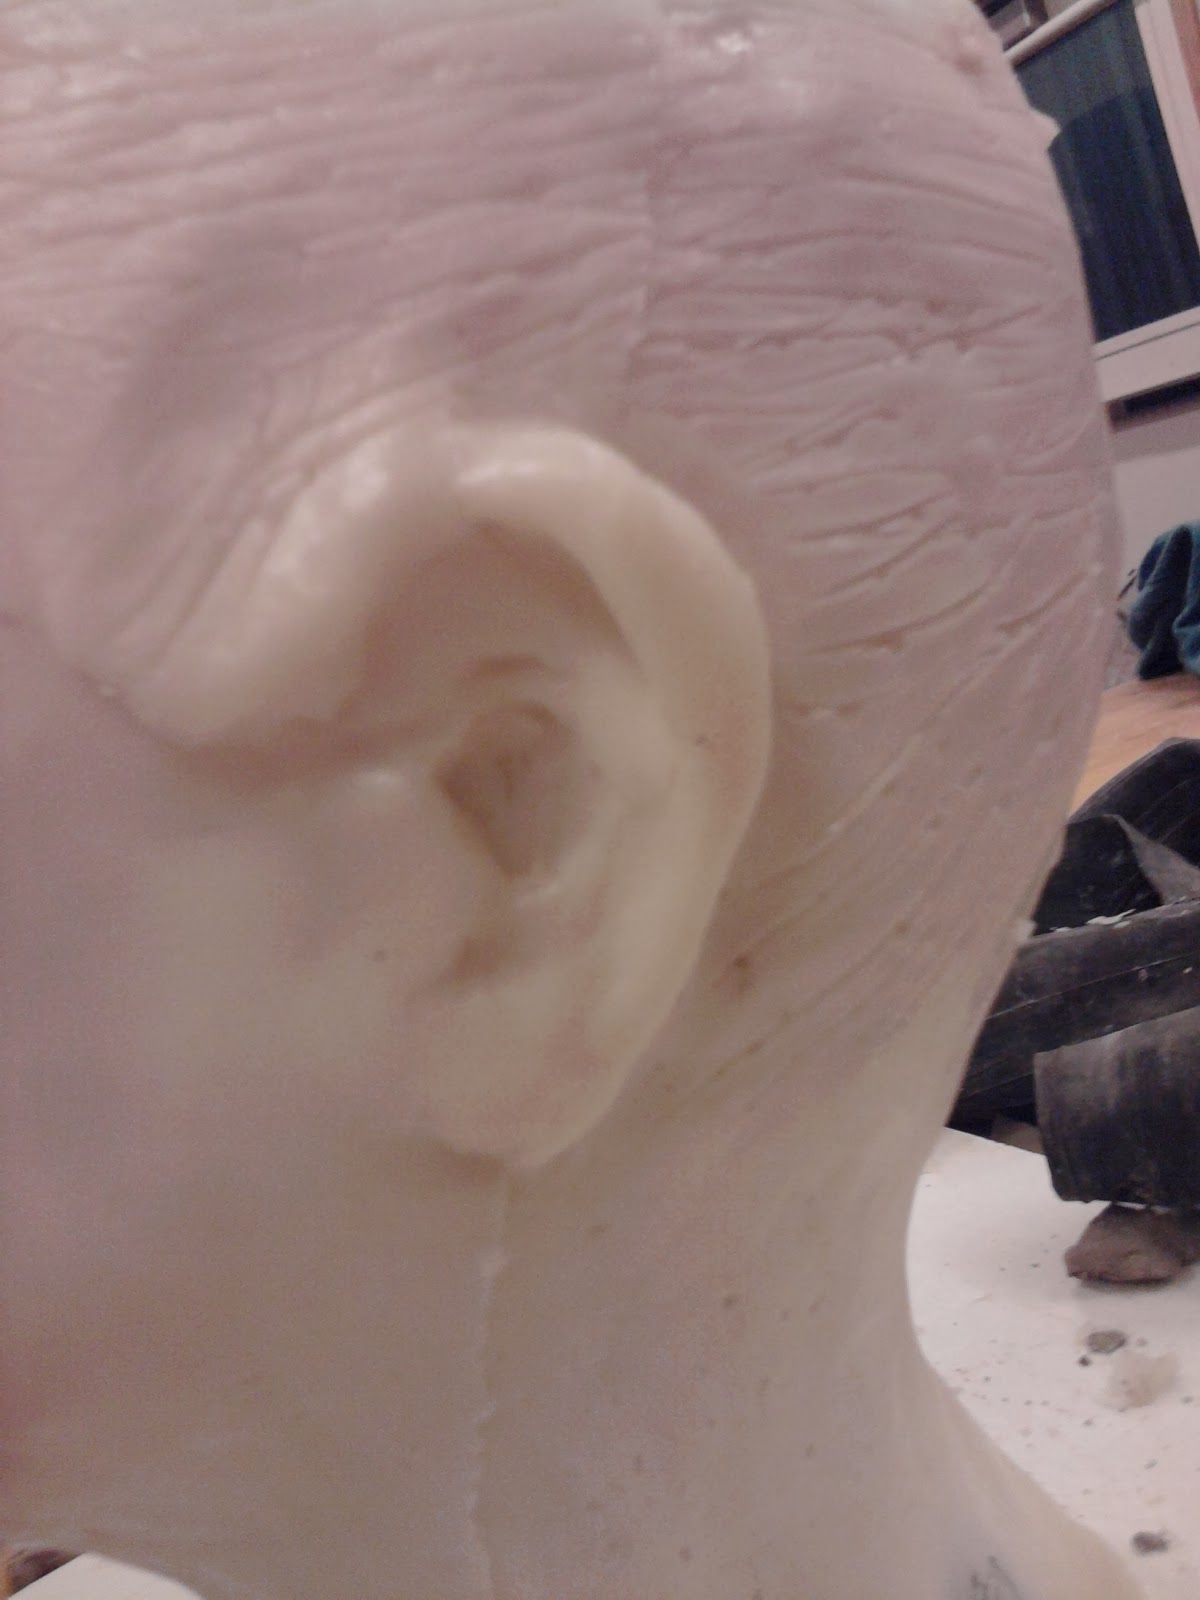 |
| EAR!!! also small seem line easily fixable |
 |
| I cut off the ponytail of my original for casting. purposes. It would look less awkward with some sort of hairlne in the back or a pony tail. Could add later if I wanted but I believe I will be filming this from the front. |
 |
| Anna inspecting the head while it is still warm |
 |
| Just took lots of photos. I was pretty excited |
 |
| Except for that eyelid I am very happy with how these eyes turned out. Very shiny and smooth. It is making me reconsider if I want to use my resin eyes at all for this version. |
 |
| Clay head in the background. Mold also in the background. It is a messy process but I cleaned up afterwards. haha. |
 |
| One more photo straight on. Excited for this project. |
 |
| Anna with my head after I attempted to take her photo with my phone cutting off several times. Thank you Anna for all of your help with my mold!!! :) |
 |
| Updated photo of aluminum under head |
 |
| Side view aluminum underhead |
 |
| can kind of see my reflection in these. yellow shirt. |
 |
| front view outer head in oil based modeling clay. |
 |
| side view |
 |
| Pony tail is chopped off. It was not working well with the mold/etc. |
 |
| Anna helping cover the head with plastic and then water based clay. Creating a blanket mold. |
 |
| Mohawk before the plaster is added. Anna helped a lot on these steps. She helped me make sure nothing went wrong with this mold. I had never done a mold this way before. She covered the head in clay. Made a plaster mold and then filled in where the clay used to be with rubber. |
 |
| HERE's JOHNNY! The head going into the plaster mold one last time before adding the rubber. |
 |
| Head is strapped down and rubber is being poured |
 |
| Another Angle. Way to go Anna!!! From here I have to wait 12 hours for the rubber to cure. Then I can cut it open and start pouring my wax heads. More progress photos to follow. |