Showing posts with label megan rose hughes. Show all posts

Monday, January 19, 2015

3 day weekend Day 3

Day 3. Casting,  Sanding, Painting

Today I spent using the dremel tool to fix all the mold defects from the cow that I cast last night. I also sanded the base part flat.

I then sprayed it down with a plastic primer and let it dry. After that I started painting. I did a dark layer first to get into all the cracks and details and then worked my way lighter. My first coat will be completely painted over when it dries in a couple of days this first layer was just to fill in color. The next layer will clean up and detail parts and finally I will go back in and finish minor details once everything is dry.

I also cast another cow but had some air bubbles due to pouring the resin in 2 parts instead of a single pour and I poured a little too fast. I am purchasing some apoxy sculpt to see if there is any way to save it.

First layer of dark paint to fill in details then wiped off.

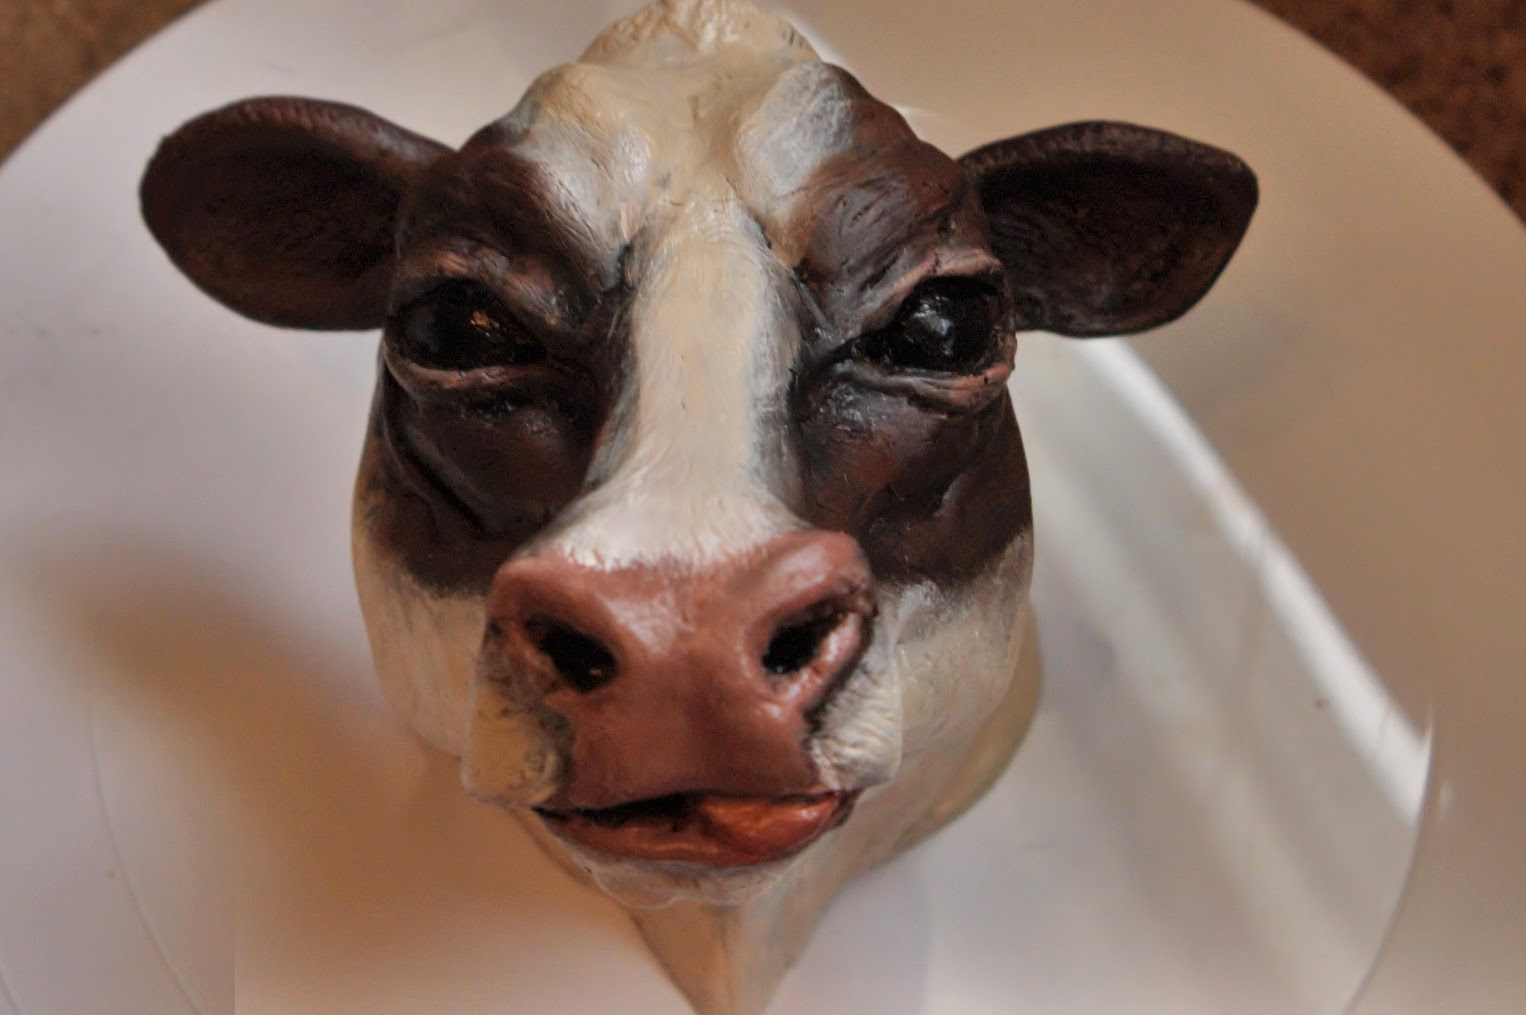
First layer of paint. Still wet. Marked off kind of the colors I want and where. Will paint details when it dries.

Another angle. Needs a lot of touch ups once it dries

The three heads so far. Front: dry head. Left: Wet head with 1 layer of paint. Right: Newly cast head with Bubble defect in ear.


Overall I think it was a pretty productive 3 day weekend. :)

Sunday, January 18, 2015

3 day weekend Day 2

Day 2. Sanding, Router, Casting

Sanded the mounts today and used my Router attachment on my Matrix

ooo smooth and rounded edges :)

And poured a LOT of resin to make another cow head. Going for 3 of these guys if I have the resin for it.


Fresh out of the mold cow. This is before I have cleaned up the seams or anything.
First painted cow next to fresh cast cow
Another angle of painted cow next to fresh cast cow

Saturday, January 17, 2015

Three Day Weekend Sculpture progress Part 1

After starting a new job and then Christmas commissions it has been a long break for me from doing some sculpture progress towards my series. I decided that since I have a 3 day weekend and since I have nice weather I might as well get a little progress done on my sculpture pieces.

I am still doing oil painting as well although I can do that on cold days and evenings so I decided to take this chance to get caught up with some sculpture stuff. I got to whip out some of my new tools. I got a new trim saw attachment for my Black and Decker Matrix from my mom for Christmas I also got new saw horses.


Day 1.

My set up. Normally I would do this in the yard away form the house but it was REALLY windy today.
New trim saw attachment on my Matrix. :) Next to it is the first cut I made with it. Does a very nice job cutting a straight line.

Safety first ;) Haha this was my temporary set up for the band saw. Just cut out three small things today.


A few rough cut outs of my base. Tomorrow I will sand these up and fix up the edges and then use the router attachment for my Matrix. Then  I will prime and paint.


Monday, September 1, 2014

Updated photos

I took some new photos of two of my paintings. I also did a new layer of paint on the resin cow. I have been sick the last couple days so my progress has been slower than I like. My goal is to finish this resin piece tomorrow morning so that I can take final photographs.


Here's what I got out of today:


Friday, August 29, 2014

Painting my cow. Also Art Focus

I was mentioned in Art Focus September/October 2014. I thought I would post that here. :)
http://issuu.com/ovac/docs/artfocus-septoct14?e=1732622%2F9113598


Also I thought I might as well post progress shots of the resin cow head. I started painting it to see how it would turn out.

I first used a white spray primer.
Then I air brushed brown and black acrylic to get into the lines.
Then I started painting with oils. Not sure if you are supposed to paint on Resin with oil but I figured I primed it and painted with acrylic, it was worth a shot.

Here are some photographs of my first oil layer. I plan to do at least one more layer of paint if this layer ever dries.  If this piece turns out I may do a series of them... more plans to follow.
Regardless I plan to cast some wax cows tonight or this weekend.
Before paint

with first layer of oil

first layer of oil


First layer of oil

First layer of oil


Moo!

Wednesday, August 27, 2014

Cow Head Progress

I got my mold completely finished and tested for my second round of larger cow heads. (larger than faux bovinae and meant to replace that piece)

The mold is made of Smooth On "Stroke" brush on silicone. The mother mold is plastipaste in three parts. I started this piece before the summer and finally got around to finishing the mother mold. It holds together fairly well. I was able to test the mold today using a decent amount of Smooth-On Smooth Cast 300 White Urethane Resin.  I made the mistake of trying to add more resin to the piece once the original resin had cured and got a bit of overlap. I went over the overlap with a rotary tool and was able to do some touch ups to get the piece closer to normal again.

I plan to cast a few wax ones Thursday and Friday for a melting piece. I might paint the resin one for fun and mount it as well.


Inside out cow head. The is the view inside the silicone mold
Resin next to clay


some demel work started

Resin Cow. Moo.
From Another Angle. My hand in there for size. Some Dremel work started.
Still a bit dirty from in the mold. Once touch ups are done it will be primed
and painted.


Saturday, August 23, 2014

Cow then and now

Here is my final post of this painting for a couple months. Time to work on other stuff.


There is sunlight coming through on the left side window so the colors are a tiny bit off in this but it is close.


Progress

Thursday, July 24, 2014

Summer Sculpture fun

Here is a progress dump of sculpture stuff from the end of the semester and into the summer.
Here is the cow head in oil clay. I showed this one in an earlier post.
It is larger than my previous cow heads and is meant to replace them.
With Brush on Silicone


Beginnings of mother mold. it will be 3 parts


Home made Chevant melting box so that I dont have to buy a
toaster oven. I am starting to work with hard chevant clay.

Melted Chevant on a screw


Bald mini chevant head on a screw
Looking like Sir Patric Stewart.  I think I will keep working
on him as such. Just practicing detail with the chevant on a
small scale.. no real plans for this.
Random shelf in my studio

Small clay model for my large foam dog I was working on.
It's raining foam!!- I want to continue with this project but it
is so messy!
 

Yep. Those are the highlights. Pretty simple. I have been doing more painting than sculpting this summer but I am playing with the chevant and finishing up the new cow heads.


Friday, July 11, 2014

Art Focus!


Here is another progress pic of my oil painting in progress... it's been slow and steady. I have been working on it here and there while getting some other work done this month. I added some detail to the water droplets on the cows nose today. :)
Previous Progress

New Progress


Water on the nose


ALSO! I had a photo of my work in Art Focus Magazine this month. You can see it Here

here is a photograph of it if the link doesn't work for anyone.

That made me pretty happy to see. :)