Sunday, August 26, 2012
Thursday, May 31, 2012
Sunday, May 20, 2012
Lathe
I found a video on youtube about how to make a Jaw Breaker shot glass using a lathe.
That looks so fun! I have never used a lathe before but it looks very interesting!
I checked Amazon.com for prices of Lathes and some books on how to do it.
While I was looking I found a book called Tauntons Complete Illustrated Guide To Turning. The preview looked very helpful and I would consider buying this book if I was going to teach myself to do this. Unfortunately I live in an apartment and all of the saw dust (or sugar dust) would get everywhere. This is something that requires some workspace.
Monday, April 30, 2012
Casting

My original fish for the plaster casting project was very large. We made a wooden support for him so that he would he completely 3D to be hung. It was hard to scale him down because the wooden support was a bit large.


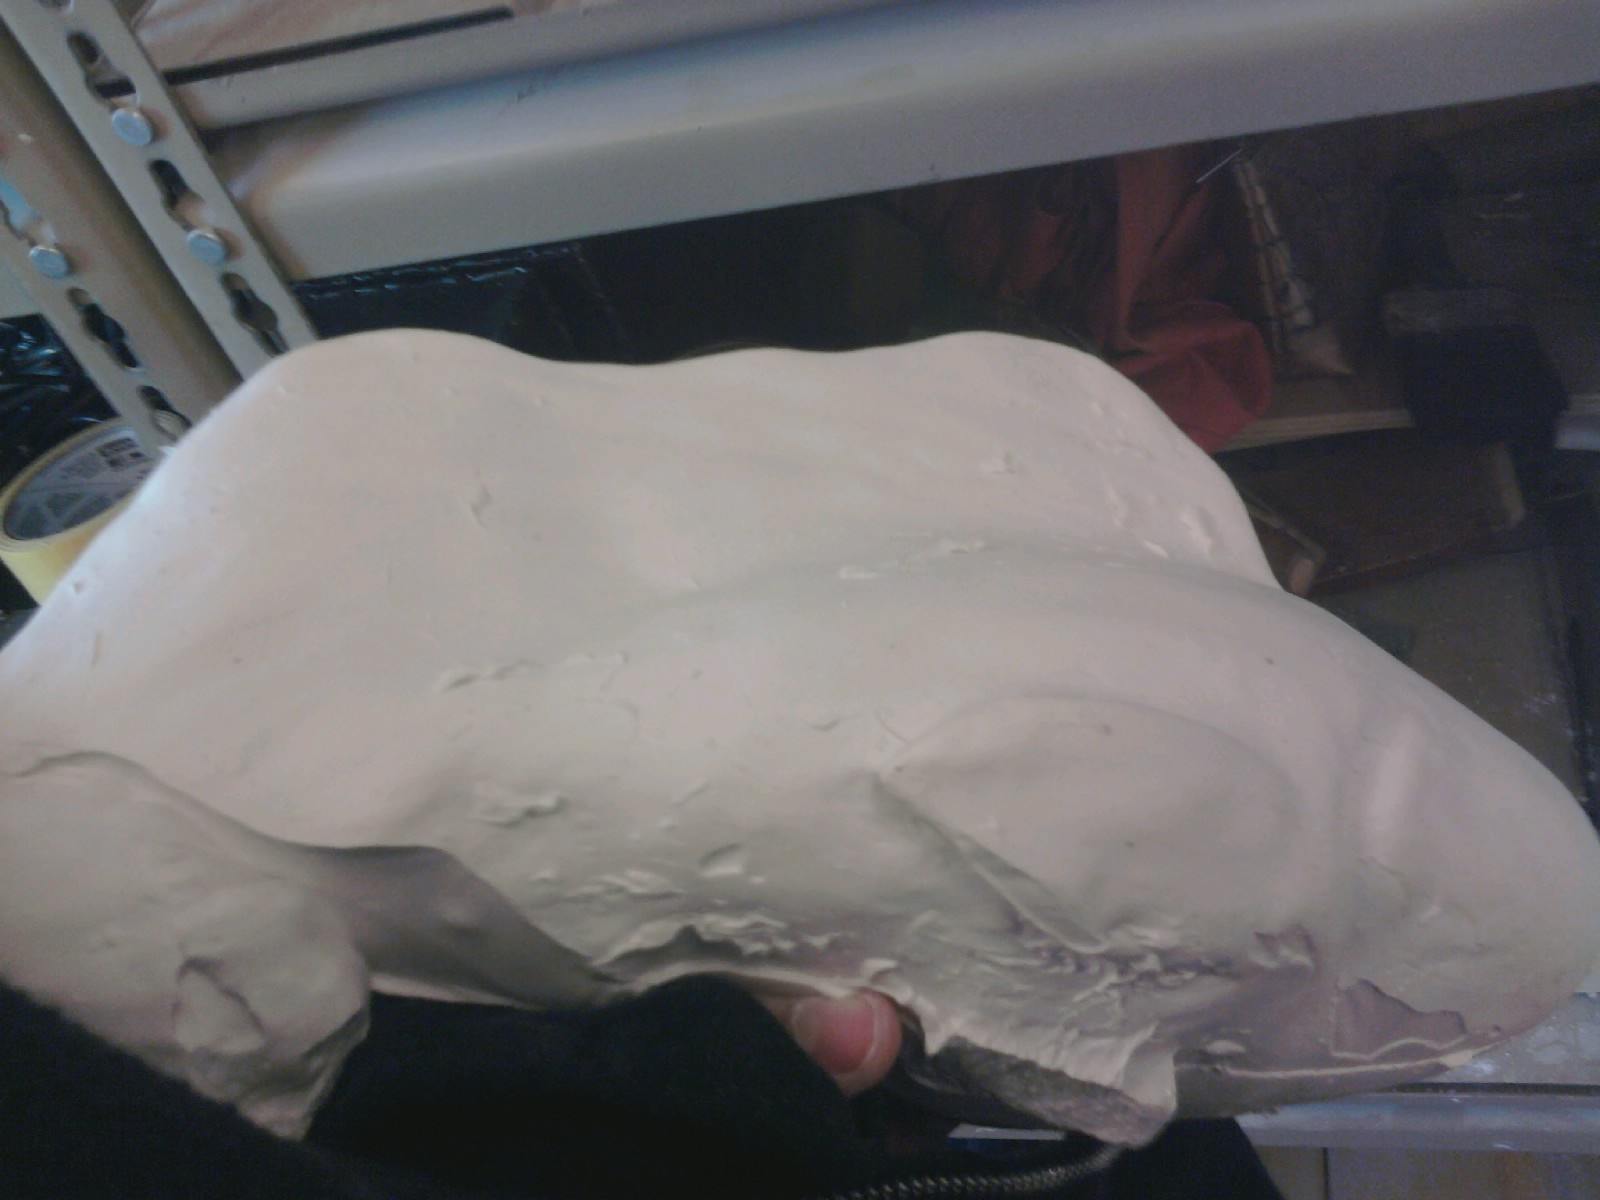


I chose the better looking of the two and made a small plaster master mold for it.


Luckily there were still enough fish to get the point across and I was able to finish hanging them and present them. Overall they turned out ok. They spun in the wind which added a more lifelike quality to them.
I learned a lot from this project and I was able to do every step on my own from home. My next one will be a bit more complex now that I have a better grip on what I am doing.
Friday, March 16, 2012
Wooden Dragon Continued
 |
| I used the band saw for a majority of the cutting and then sanded down the parts. The shape of the tail made it particularly hard to cut with the band saw because it would hit the wall and get in the way. This picture is of the head body and tail finally put together. I took a photo with it to show how tall it was getting. |
 |
| I attached the legs and added feet and claws. I made the feet flat so that it could stand on its own two feet and I added claws to the feet. The claws ended up helping give the dragon a wider footprint and made it more stable. Because I ended up having to make my dragon a lot thinner than I had originally planned he did not have a very wide stance and so the ankles ended up having to attach to the sides of the feet which gave the dragon a bit of a wobble side to side. The claws helped with this and later triangles were added to the ankles for extra support. He can stand on his own pretty well but if he were to be outside in the wind I think I would add an additional pole or something for stability as he could still be knocked over possibly in a large gust. |
 |
| Once the dragon was all put together I painted on white outdoor primer on him. For any interior parts I felt I could not reach with the brush I used a spray on primer. I then started painting him a cherry red color with some outdoor paint. It took a lot longer to paint the sculpture than I had originally thought it would. The paint also ended up costing a lot more than I expected. |
 |
| I added touches of black to his horns, tongue, and claws. Here he is after he was finished being painted |
 |
| Here is a close up of the black trim on his horns and tongue |
 |
| We had to take the sculptures home by the weekend because they are so big and take up so much space. We did not have a truck and we weren't sure if or how we were going to get it home. Luckily the back seat of my husbands car folds down and we were able to get the dragon in deep enough to be secure. We used straps to hold him in and the trunk closed. I am sure it confused the other drivers on the road. |
 |
| Once we got it up the stairs I realized how ridiculously huge this sculpture was. I had to take a picture of it on the balcony because I found it kind of funny. It is a little bit big to fit in the apartment and I am hoping to find a more permanent home for it soon. |
Some parts of the dragon turned out really well and some parts of the dragon had to be compromised for time. I would have really liked to have made him wider with slats in between his torso and head. I also would have liked to have made the more complex wing design I had decided on which would have made him more 3-D. I also thought about hanging canvas or something from the wings to give them a membrane. Time was not on my side with this project and I simplified it quite a bit to get it done by the deadline.
All of my original measurements were pretty spot on and my initial planning went really well. If I had been more confident with the wood working tools and had more time I think that the dragon could have been just like my plans. As it is I am almost glad that it is not because it would have ended up taking up even more space!
The sculpture has outdoor paint and so it can go outside if it has to some day. I am hoping to find a place to keep it other than my apartment because it is so large.
All things considered I think I learned a lot about working with wood and I feel a lot more comfortable with the tools and process. I think that the next time I work in wood the project will go a lot quicker and smoother and I will know more what to expect.
Tuesday, February 14, 2012
Assignment 2 Wood Sculpture
 |
| (2/9/12) Here are my rough plans for the start of the wood sculpture. I added rough measurements where an inch equals about a foot since it has to be as tall as me. |
 |
| (2/9/12 - 2/14/12) I first drew out some of the larger shapes and made cuts with the jigsaw. Then the smaller shapes I was able to take over to the band saw and sander. |
 |
| (2/14/12) I got some of the smaller parts cut out and I compared the sizes to make sure everything was going to fit together well. |
Friday, February 10, 2012
Finished Sculpture 1
 |
| (2/9/12) It is finished! yay! |

 |
| Different camera makes the color look drastically different |
Tuesday, February 7, 2012
Painting The Jalapeno
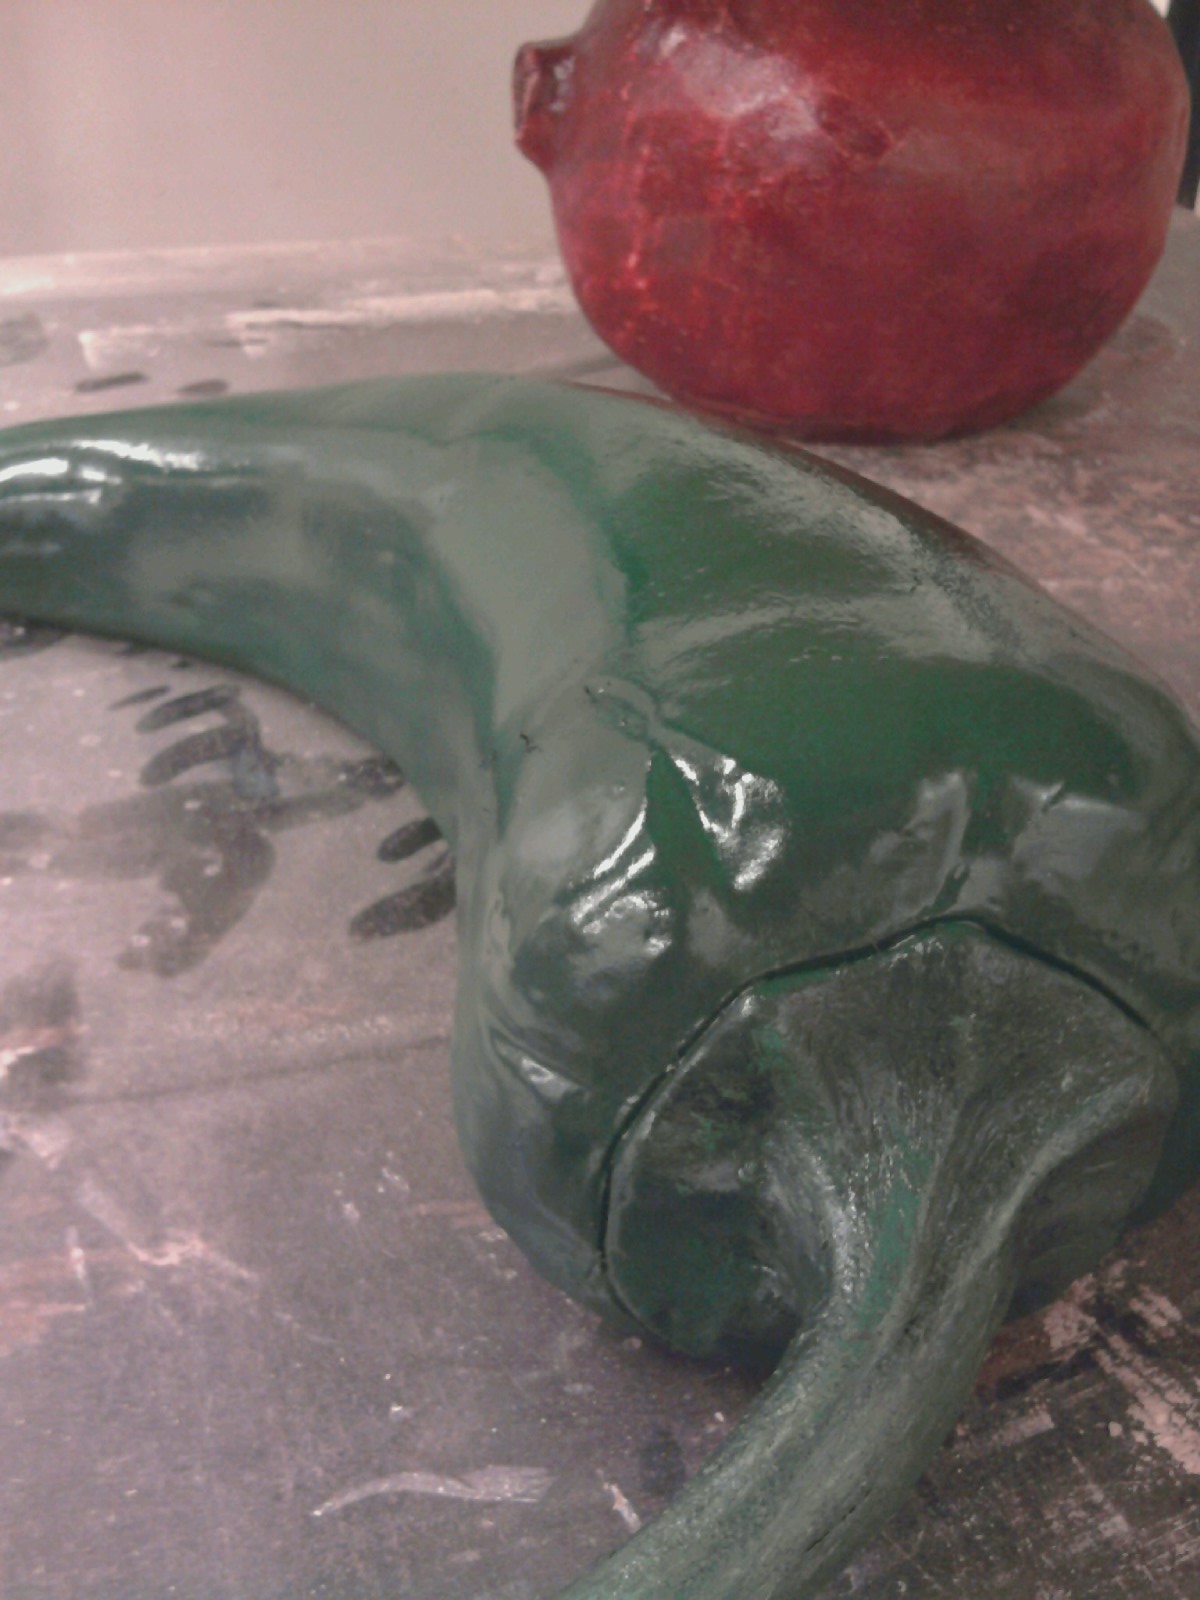 |
| (2/7/12) Here is the finished pepper all painted and ready |
 |
| (2/7/12) I put the pepper back on the cart with it's veggie sculpture buddies to chill until it is time to be critiqued. |
 |
| (2/7/12) I added a gloss coat on top of the paint. It gave the body of the pepper a very shiny look. I thought it was still wet at first and so I waited around a long time for it to finish drying. |
 |
| (2/7/12) We painted our clay sculptures today. I used three different green paints and a mixture of different colors on the stem. The main color used most was from a can of Rust-oleum I bought. That green ended up looking a lot better than the krylon I originally thought I would use. We put the sculptures up on cinder blocks and painted them outside. When I was done the cinder block kind of looked like it was growing a green moss. |
Thursday, February 2, 2012
FISH
 |
| (2/2/12) My pepper changed color and shape. It seemed pretty rotten so I finally threw it out today. Goodbye loyal pepper! You will be missed. |
 |
| (1/31/12) We started learning all of the tools for our wood project. We cut out fish using the different tools to learn before we started our sculptures. I have almost no wood experience and the tools made me nervous the first day and I left a lot of space. I wanted to make sure I did everything right and safely.. after the first day my fish did not look too good. |
 |
| (2/2/12) After the second day... and a lot of help... I finally finished my fish! Yay! It may not look like much but I was very happy to get it done because working in wood made me very nervous. I was very grateful for all of the patient instruction I received. I spent the rest of the day trying to finalize an idea for my wood sculpture. |
Wednesday, January 25, 2012
Assignment 1: Part 2
 |
| (1/24/12) On the final day of sculpting I thinned out and centered the stem a bit more and tried to add a wood type texture like what was on the real pepper. The stem was still a bit thicker than the real pepper but it had to be about 3/4 an inch. |
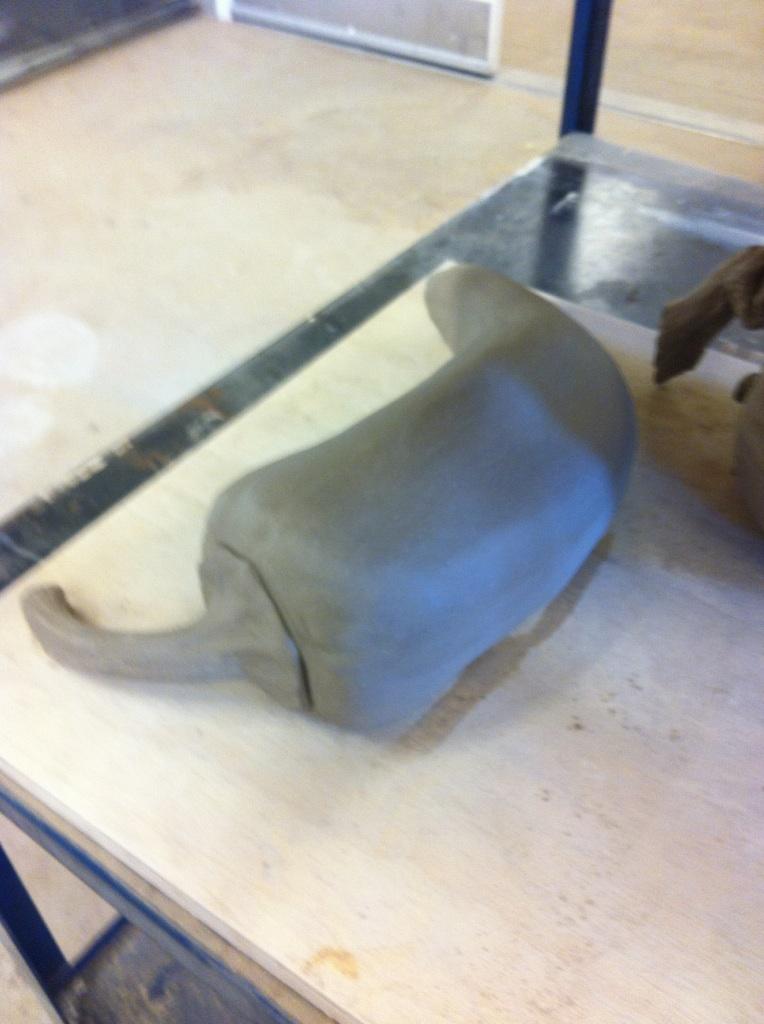 |
| (1/24/12) We hollowed out the insides of our sculptures so that they had a wall thickness of about 3/4 of an inch. My pepper is kind of long and skinny so there were a few parts hard to get to but not terribly hard. The clay was very stiff by this point and I ended up snapping on of my wooden tools removing the chunks of clay. We also made a little notch for air to flow in and out of the sculpture on the bottom. Mine is located on the bottom end of the pepper where it naturally raises up a bit anyways so it was pretty well disguised. |
 |
| (2/2/12) We got our sculptures out of the kiln today. The pepper did
not explode, yay! It was still very hot in this photo- probably the only
time it will ever be a hot pepper. :P The next time we get together we will be painting them. |
Tuesday, January 17, 2012
Assignment 1: Sculpting
 | |||
(1/12/12) I
chose to do a jalapeno pepper for my vegetable. After working the air
bubbles out of the clay I got roughly a 10 inch long rectangle and drew
in the outline of the pepper on the top and a side of the clay and
started cutting off chunks to match the original pepper.
|
 | |
(1/12/12) I left
plenty of room around my original sketch lines so that I could subtract
material slowly and more accurately. Here is an early above view.
|
 |
| (1/12/12- 1/17/12) After about another hour of shaping the clay more accurately we
wrapped the pieces up for the weekend. This is a photo I took when I
came back the next time so the pepper looks a bit more dry. :P |
 | |
| (1/17/12) The real pepper started to kind of shrivel over the weekend too.. I took some photos of it for a reference in case it doesn't last much longer. |
 |
| (1/17/12) Since the clay had dried and hardened a little more I was able to
start shaping the bottom of it and making it look a little more three
dimensional |
 |
| (1/17/12) After a while it started looking more pepper shaped in the body. The stem still looked kind of blob shaped because I wanted to save it for last so that it would not break off or dry out any more than it had to. |
 |
(1/17/12) At
the end of the day I sprayed down the pepper and wrapped it more
tightly in the plastic bag so that it would dry out less until the next
time I used it. (especially the stem) Here is my slimy, shiny, pepper.
|
 |
| (1/19/12) Forgot my phone and had to have someone else in class take a photo this day. I started sculpting out the stem today. It can't be the same because the stem would be way too long and thin and so I had to make it shorter and thicker. I spent a lot of time trying to round out some of the little details but there is probably still some work that needs to be done. I also started adding some detail to the bottom (or opposite side to stem?) of the pepper. |
Subscribe to:
Posts (Atom)